Credit Card processing through stripe is offered for Silver and Gold accounts. It offers a more seamless experience than PayPal, giving your organization a more professional appearance. Here's how to get started
1) Create your Stripe account
Go to www.stripe.com. Ensure your country is correctly selected at the bottom of the page. Stripe currently supports a number of countries including the US and Canada.
You will be asked to provide an email address and password. A validation email will be sent to ensure your address is correct. Click the link in the validation email.
2) Activate your Stripe Account
In order to start collecting payments, you'll need to provide some information about who you are.
In the upper right corner of the Stripe dashboard (login again if necessary), click on Your Account > Activate Account.
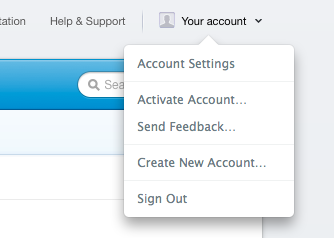
Fill in the activation form carefully. It has four sections:
Organization/account information - including address, business number, and a description of what you do
Personal information - your name, date of birth and ID to confirm your identity
Credit card statement details - information to appear on your customer's statements when billed
Bank account details - your organization's account where the funds will be transferred
This information will be reviewed by Stripe. It may take a few days for approval. You should receive email notification from Stripe of your approval status.
3) Adding Stripe API Keys to SportiCal
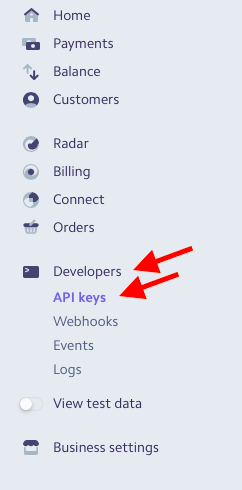
In left sidebar menu of the Stripe dashboard (login again if necessary), click on Developer > API Keys. Under Standard API Keys look for the Publishable and Secret Keys. They should start with pk_live, and sk_live.
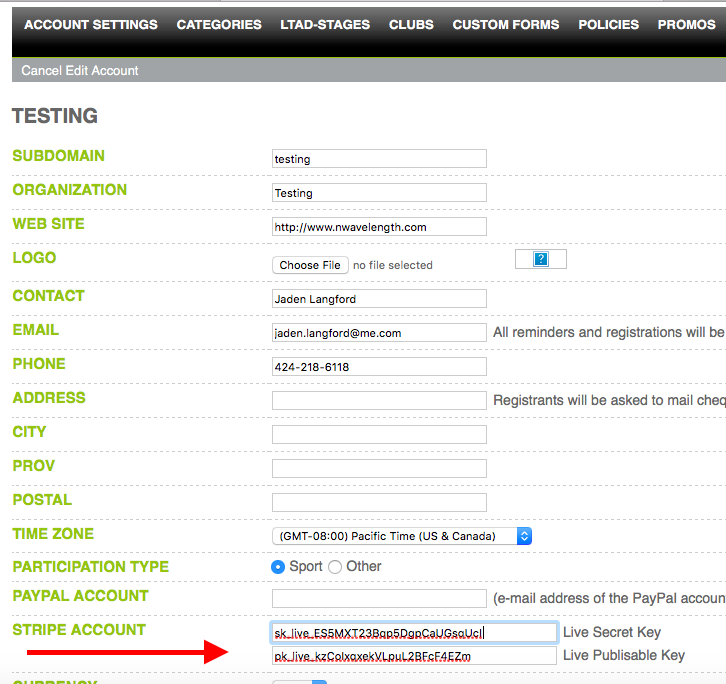
Login to your SportiCal and go to My Account (bottom right)
Under Account Settings, click "Edit this account"
Click the gear icon next to Stripe Account
Enter the two Stripe API keys carefully, and press the Save Changes button.
Now under Stripe Account it should say "Connected and able to receive payments". This confirms that you are able to receive credit card payments through your SportiCal account. Note: you can also offer PayPal by providing a PayPal account email address. if you leave the PayPal account field blank, it will not present PayPal as a payment option.
If it says "Connected but not activated", everything is good to go and you are just waiting on Stripe to approve your account.
4) Using the Stripe Dashboard
Now that SportiCal and Stripe are integrated, the Stripe dashboard will show the payments coming in, allow you to refund customers (if needed), and also modify the bank transfer settings. By default Stripe will automatically deposit funds in your bank account every week.
Stripe Dashboard is also accessible through an iPhone/Andriod app
5) Payment Details and Refunds
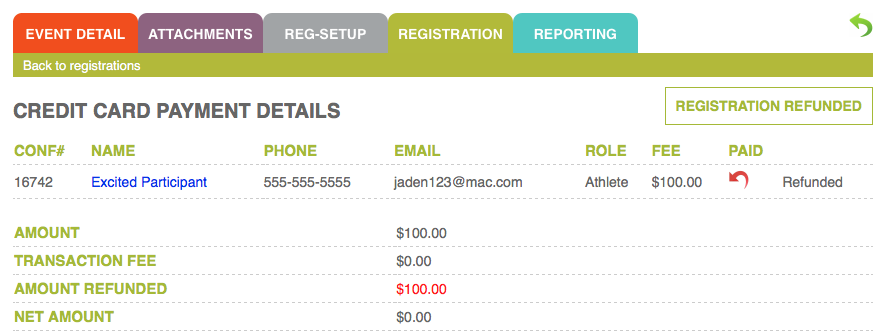
Once you start receiving credit card payments, you can view the details of the charge and issue refunds within SportiCal. Under the Registrations tab, notice that "Credit Card" is clickable.

By clicking the link you will see additional details including the amount paid, transaction fee, cardholder's name, last 4 digits of the card, expiry date, etc.
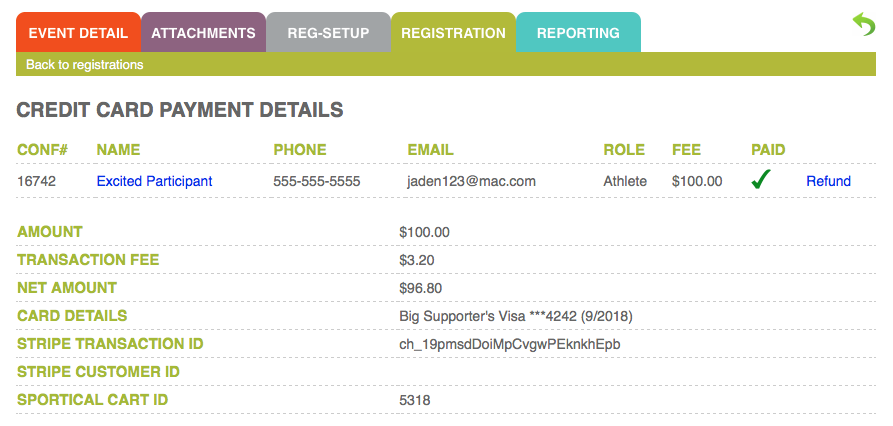
The "Refund" link will take you to another page where you can refund all or part of the fee to the Credit Card used to make the original payment. You can also specify a reason for the refund and move the registration from confirmed to pending.
Note: Stripe no longer returns transaction fees on refunds for accounts opened after mid-2017. Older accounts appear to be grandfathered into free refunds.
Note that it can take up to 5-10 business days for the refund to be applied to the card.
Refund Icons
- Red circular arrow- FULL refund
- Grey circular arrow - PARTIAL refund
6) Stripe Dashboard Webhook
If you issue refunds using the Stripe Dashboard you'll want to setup a "webhook" so that SportiCal is notified of these refunds.
- Login to the Stripe Dashboard
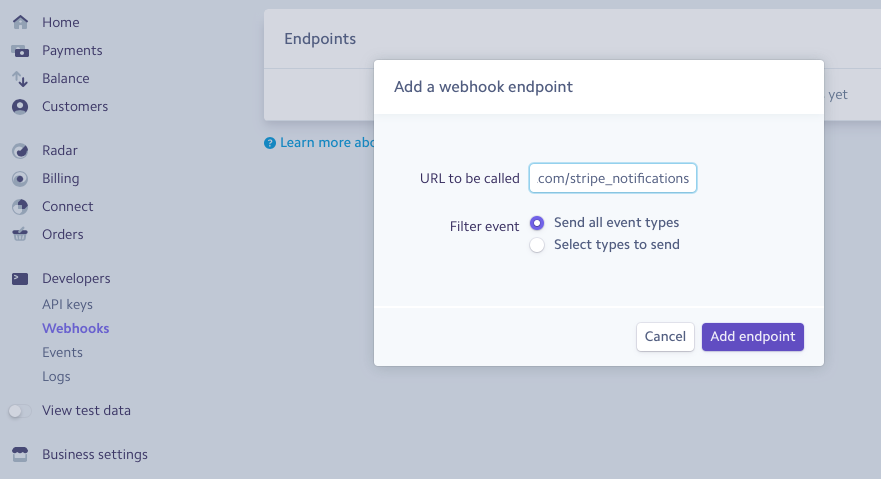
- Click on "Developers" and then "Webhooks"
- Click the "Add endpoint" button
- Enter the URL as https://youraccount.sportical.com/stripe_notifications (replace "youraccount" with your actual SportiCal subdomain)
- Ensure mode is "Live" and "Send all event types" is selected
- Click "Create endpoint"

Comments
0 comments
Please sign in to leave a comment.